I ordered something to sit on the top of that box (I gutted two of those boxes years ago to hide small appliances. My rule is only one appliance on a countertop) to hide the cord.
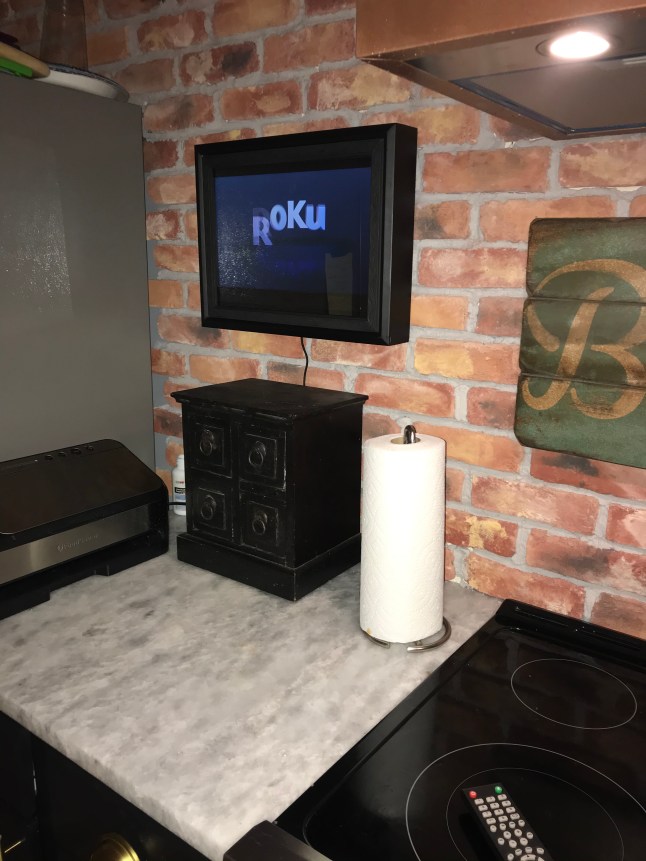
I ordered something to sit on the top of that box (I gutted two of those boxes years ago to hide small appliances. My rule is only one appliance on a countertop) to hide the cord.
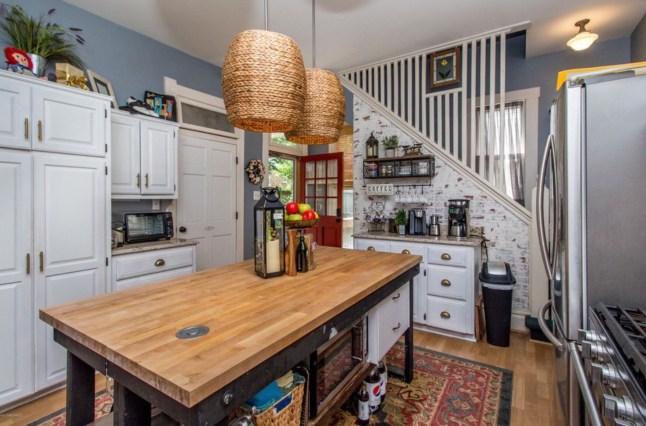
As my last post ended, we had bought a house in Lexington, KY. It’s cute and although we moved kicking and screaming in a sense, it’s a nice place. But this is what the kitchen looked like:
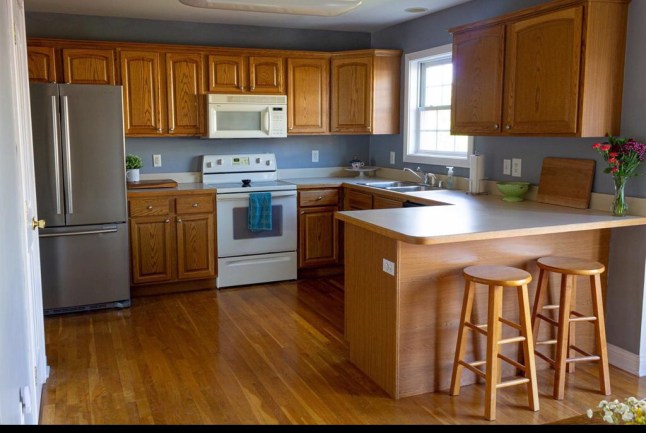
Yikes is all I can say!
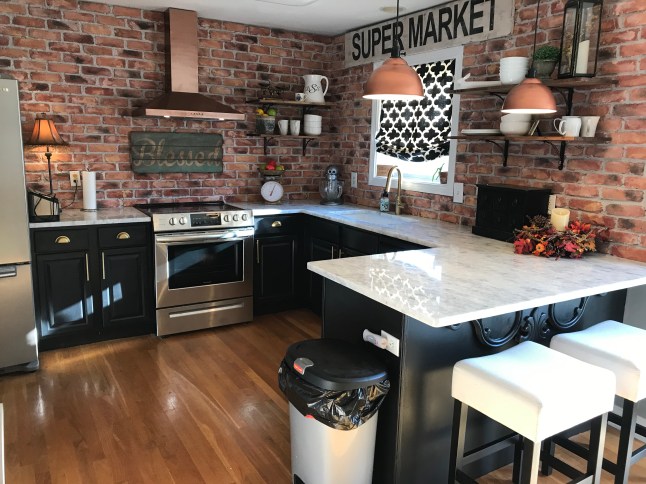
I knew I wanted something very different and something bold. This is the finished product 2 months later….
I started my plan to tear out all the upper cabinets, much to my husband’s chagrin. He was not happy! Sorry, dear, we’re doing it.
After the uppers were gone, we ripped out the countertops. I was so nervous about going to a design center to talk about nice countertops. A little intimidated, actually. Well, that was silliness because it was a breeze. The day we visited the place, I picked out my choice of material and the slab. They scheduled the measuring for a week later and 6 days after the measure, the countertops were installed! I couldn’t believe how easy and quick the entire process would be.
I chose Marble for my countertops. I went in with the intention of finding the perfect Quartz. I knew I didn’t want granite. The patterns just aren’t something I am interested in. They are too busy for me. I want all the movement in my kitchen to be on the walls.
Although I found a bunch of quartz slabs that I loved, gosh, the price was a lot more than i had hoped. That’s why I started looking at the marble slabs. The entire bill for the countertops and single basin sink came to $2,300. Not bad!
I had done some research on Marble since we have all heard the horror stories about the etching and staining that marble is subject to on a daily basis, but it was worth the risk to me. I am truly not disappointed. I love it! The only thing I wish I had thought about was to get honed instead of shiny. Otherwise, it’s been wonderful. I’m just am careful with spills, getting any kind of lemon or lime juice on it. Otherwise, it’s no different than being careful with any type of countertop.
Okay, so that’s the lowdown on my countertop. Here’s how I did the brick backsplash.
I was pretty set on wanting a brick backsplash. Just something about the warmth and coziness of brick. Something I needed in our new life here in Kentucky.
As everyone does, I searched and researched what kind of brick to use and how to adhere the stuff.
This is what I went with. Home Depot’s Old Chicago Brick. It was reasonably priced. I liked that each brick was a little different and looked old and “real”, though it really is brick, just that it’s much thinner.

I used Loctite Power Grab Heavy Duty Construction Adhesive used in a caulking gun. It worked great! I was able to push on the brick for only a few seconds and it held firm every time.

For spacing I used a 1/2” dowel rod. But let me assure you, about 5 rows into it, you end up just using your eye. After all, I wanted it to look like it had been there forever.
Cutting the bricks wasn’t too terribly difficult. If you score then, then snap them, most broke perfectly. There were a couple of tough ones and a little frustration but all in all, it worked. We used a saw to score deeper on some and that worked as well. A tile cutter didn’t work for us on these bricks.
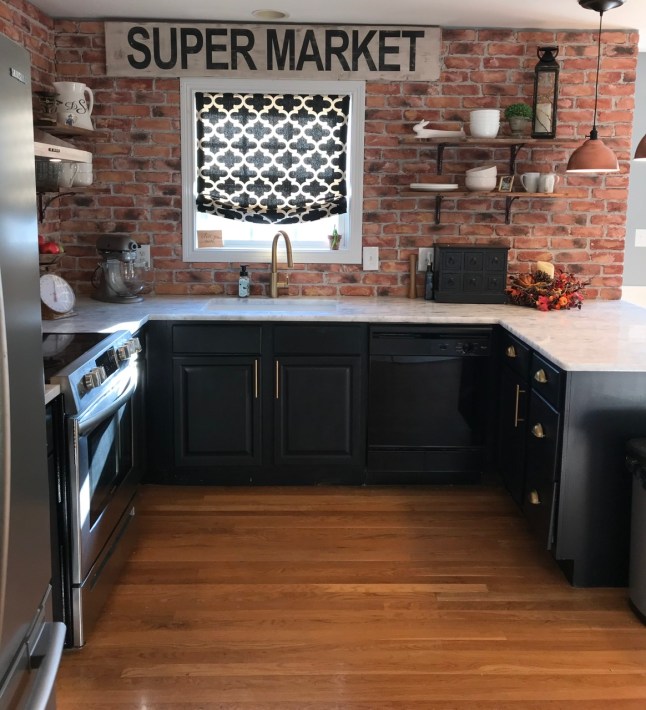
Here’s a picture of the first few rows that i completed.

My only problem with putting the bricks on the wall was completely my fault. I thought I would be so smart to wait until the countertop had been installed before putting the bricks on. Bad idea. Duh, how was I supposed to get the top bricks on??? You can’t stand on marble! The ladder, no matter which one I tried, wouldn’t get me to those upper corners. Holy cow, was it a challenge and one I wish I had a picture of. I used one of those old people (yikes, I AM an old person!_ grab tools. The ones that you can stand and pick something up, say, off the floor. How the hell I managed to get those bricks up still amazes me, but I did it. So my suggestion would be if you have laminate countertops, use those as your way to get any sort of tile beyond your reach with a ladder! I suppose laminate could give way or crack, but I’ve climbed on them many years ago and they were fine.
Next….grouting. I tried three different grouts and mortar. My problem was even using regular mortar with a grout bag, it wasn’t adhering, so the damned stuff was falling off. It was the consistency and look and feel of just wet sand. I struggled a lot. But by the time I thought to myself “gee, Susan, move on to something else”, well, I already had dried mortar. I was stuck. So I continued with the mortar. Don’t! I couldn’t trowel it on because it would have left a finish on the bricks that wasn’t what I desired. I did use something different when I put the brick over existing ugly tiles on our fireplace. But that’s a different post!
Bottom line here. I’m not young and I was able to do the entire kitchen by myself. It took me 9 days to finish it. i love the look and it does give me that cozy, warm feeing every time I walk in to the kitchen.
It’s been a really long time since I’ve posted. I’ve completed so many projects and yet haven’t shared them. Time, some laziness in the beginning and a major change in our lives.
Three years ago we moved a mere 30 minutes from where we were living, to a quaint little town. We had stumbled on this house and knew right away it needed to be ours. An 1898 Victorian home with all the character and charm I had only dreamed of. I love this house and I love the people in this little town.
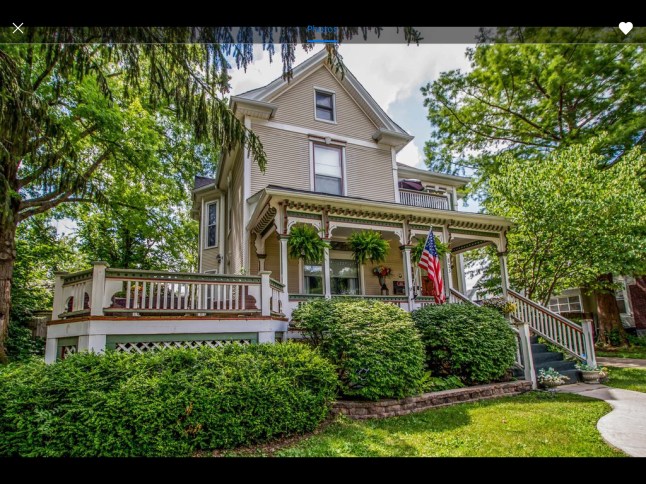
Everything was still in it’s original form. We couldn’t believe that over those 120 years, nobody had painted any of the beautiful wood. The only thing I had to work on was the kitchen. It was a challenging space, but I made it work.

Our oldest child, Todd, 39 years old, has lived with us and did so much of the work on this beautiful house. He lived on the 3rd floor. I loved him living with us. He filled our home with life. We truly were best friends.
But things changed. Last summer Todd lost his life in a car accident. 7 months later and I still can’t fathom that this has really happened to me. To us as a family. Living without my boy is a pain like no other.
I couldn’t stay in that house. Every inch of it screamed Todd to me, to us. Without Todd there, we had no other family other than our friends. So, after much thought we moved to Lexington, KY to be near our amazing daughter and boy oh boy are we blessed, son in law. They wanted us close, and we wanted to be close. It was bittersweet. I long for our grand home, but I know we did the right thing and everyone here has been so welcoming and kind and for that I thank God.
So we went from that house and that kitchen, to this….
Uh….not exactly my style I might say and those that know me and know my blog know, yikes!
This isn’t a blog about the grieving process, something I have had to, unfortunately, endure. This is a blog about decorating and home improvement.
So the next post which I promise to complete this weekend….the kitchen…..
